 New Features, Fixes, and Enhancements
This week's production release includes the following customer-requested enhancements:
 Multi Factor Authentication for Logging In
Following up on recent enhancements to Login Access Restrictions and Login History Reporting, Sensei Cloud now includes the option to require Multi Factor Authentication (MFA) for specified team members. This takes the login process beyond Username and Password with an additional step to validate their identity by entering a 6-digit verification code.
This setting is applied at the Team Member level: Administration > Team > Team Members > Edit Selected Team Member > Login Information.
IMPORTANT: If your organization already uses an alternative MFA method when logging into Sensei Cloud, do not enable this setting.
When Multi Factor Authentication is enabled for a user, the next time they log in, they are presented with a series of prompts that sets up the process for MFA. There are two methods for obtaining a verification code:
- Authenticator App
- Request for text message
The process guides the user to set up both methods during subsequent logins (first downloading the App, then Phone number setup) but they can choose which method to use from day to day when logging in.
Note: If you enable MFA for a user who is currently logged in, a warning is displayed that this action will log the user out of their current session. You can then decide whether to continue or wait until they are logged out.
For more information, see How to Enable and Set Up Multi Factor Authentication for a Team Member.
Primary Medical Doctor Identification
In response to requests from Oral Surgery customers, you can now designate a patient's Primary Medical Doctor in the Patient Record for patients who have multiple outside doctors. This doctor's name is displayed on the Patient Home screen, and is also presented when you create professional correspondence for the patient.
Select Patient Record > Patient Referrals. Under Outside Doctor, select the green star to indicate primary; the name moves to the top of the list. If this provider is not on the list, click Add Outside Doctor to select or create a record for this doctor.
When you select Patient > Correspondence > Send Professional Correspondence, you are able to choose one more more doctors. The Primary Medical Doctor is listed first and indicated by the star .
For more information, see How to Add an Outside Doctor to a Patient Record and How to Send Professional Correspondence.
Appointment Flow Enhancements
Following up on recent enhancements, the Appointment List (Location > Appt Worklists) has been updated again to include Seating Details for the current day, such as the ones you see in the Seated Queue. These details include where the patient is seated and real-time status updates as the patient moves throughout their appointment.
Seating Details are based on the chairs/column labels for the Schedule or Diary Day View, and the Schedule Setting: Schedule Columns are Physical Locations (No = Column/chair names; Yes = Seating Location labels). For more information, see How to Configure Schedule / Diary Settings.
In order to see these details in the Appointment List, you must enable the feature by selecting Administration > Practice Settings > Appointment Flow > Edit Appointment Flow Settings > Enable Seating Location Visual = Yes.
When this setting is enabled, you also need to update the Manage Appointment View options by selecting Show Seating Details Indicator for Today's Appointments. The Seating Details are then displayed on the right portion of the list, similar to the tiles in the Queue area.
Note: Seating Details are displayed only when viewing the Appointment List for the current day.
Note: The Appointment List works alongside the Seated Queue with much of the same information. Each practice can determine their best method of monitoring and tracking patient movements.
For more information, see How to Set Up Appointment Flow Visualization.
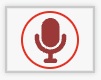 Voice Dictation for Clinical Notes and Correspondence
To provide you with the latest in time-saving technology, Sensei Cloud now offers Voice Dictation, a voice-to-text feature you can use to dictate clinical notes and correspondence. To have this feature enabled for your practice, contact your Carestream Dental Representative.
When Voice Dictation is enabled, the microphone on the editing toolbar can be selected from the following interfaces in the software:
- Clinical notes and templates
- Patient and professional correspondence and templates
- Email functionality
Simply click the microphone to begin; the icon turns red to indicate recording is active. Click it again to stop. The software adds punctuation based on your pauses while speaking. When you have finished recording your notes or correspondence, review and edit the content before continuing.
Note: Individual users can customize Dictation Settings by selecting User Menu > My Settings.
IMPORTANT: Voice-to-text dictation tools can make transcription errors. Always check your entries for accuracy after dictation and edit accordingly before saving or sending.
For more information, see Voice Dictation for Notes and Correspondence.
Defects and Small Enhancements
16 additional items were addressed.
Comments
0 comments
Please sign in to leave a comment.