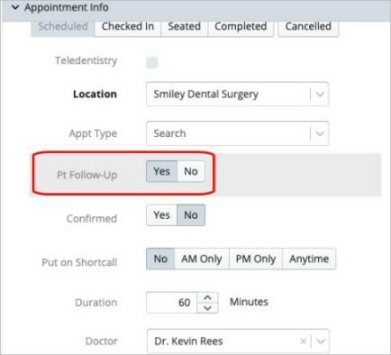
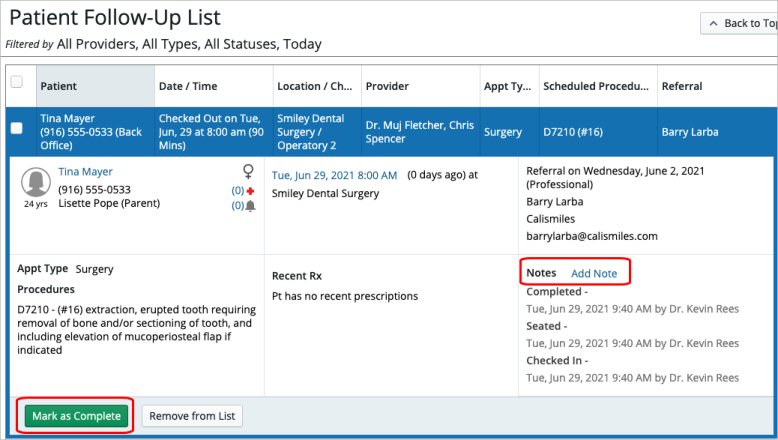
You can use the Patient Follow-Up List like a "night-call" list to follow up with patients after appointments and encounters (Location > To Do > Patient Follow-Up List).
When you flag an appointment as requiring follow-up (Appointment Card > Appointment Info >
Pt Follow-Up > Yes), it is added to this worklist for the day of the appointment.

Note: The follow-up requirement can also be set by Appointment Type (Administration > Practice Settings > Appointment Types). If Requires Follow-Up is set to Yes, appointments of this type are automatically flagged for patient follow-up.
To use the Patient Follow-Up List:
- From the Location tab, select To Do > Patient Follow-Up List. The worklist displays all flagged appointments from the current day, following their scheduled end time.

- Use the filters to refine the list by provider, appointment type or status, or date range, or search by patients or procedures.
Note: Flagged appointments are automatically included even if they never happened (such as "no shows"). This helps ensure that patients who need the treatment they did not receive can also be contacted. - Click an appointment to display additional information and add a contact note.

- When you are ready to document the contact, click Add Note. The Create Appointment Note window is displayed.
- Select the type of contact, enter your notes, and click Create. The note is added to the Patient > Notes list.
- After the contact, click Mark as Complete.
Note: If you determine that follow-up is not needed, select Remove from List. A system-generated note is added to the record.
Bulk Processing
You can use the checkboxes in the list to select multiple items to Mark as Complete or Remove from List, using the options in the Actions panel.
For more information, see How to Create, Edit, and Apply Appointment Types.
Comments
0 comments
Article is closed for comments.