Related Training
Getting Started with Automated Statements Recorded Class
Sensei Cloud integrates with Carestream Dental's Automated Statements Service. When you enroll in this service, your statements are printed and mailed for you when you generate a statement batch. To enroll, contact your Carestream Dental representative.
Note: After you convert to Automated Statements, all previously-generated, printed statements can still be accessed from the Bulk Statement Report (Location > Financial > Bulk Statement Reports).
Generating Automated Statements
To generate a statement batch:
- From the Location tab, select To Do > Statements. The Statement Worklist is displayed.
- Use the filters to refine the statements to include in the batch.
- Click Generate. The generated list is displayed, with the criteria displayed at the top, along with the number of statements in the batch, the user who generated the statement, and the date.
Note: Amounts populated in the Insurance Due column are estimated based on allowance tables entered for an insurance plan. (Administration > Insurance > Plans > Coverage > Add/View/Edit). If no allowance table is applied, the entire balance is included in the Patient Due column.
Note: You can click the column heads to sort the list.
From here, you can work with the items in the list:
- Select Show Only Accounts with Exceptions to display only accounts that need action (alert icon).

Note: You can toggle back to the full list after managing the alerts. - Hover your cursor over an alert icon to see what action is needed on the account before sending.
- If you select Inactive or All patients in the Include Patients that are filter, inactive patient accounts are displayed in the statement batch with an alert icon.
Note: Inactive patient accounts are not considered as exceptions, so if the statement batch is filtered to Show Only Accounts With Exception, inactive patients are not included in the list. - Select a line item to display details, access the patient record, take a payment, adjust the balance, or view the Ledger.
- In the Actions column, click the blue T to add a message to the statement, or click the red X to exclude a statement from the batch.

Note: When you exclude a line item, it is displayed as Excluded, with an option to restore it to the batch before printing. - Click Reset next to Filter Worklist to refine the list again.
- Select Generate New Statement Batch. You are prompted to discard the batch in progress and start again, or continue with the current batch.
Sending the Statement Batch
When you have finished updating the batch:
- Select Send Current Statement Batch. The Statement Print Options window is displayed.
- Indicate the amount of transaction history to include, and then set the Statement Due Date.
- Select which Amount Due to use: Patient or Current.
Note: Patient should ONLY be selected if your practice uses allowance tables for estimation. - Enter a Statement Message (optional) to appear on all statements in the batch.
- Click Send. The batch is transmitted automatically to Carestream Dental's Automated Statements Clearinghouse to be printed and mailed.
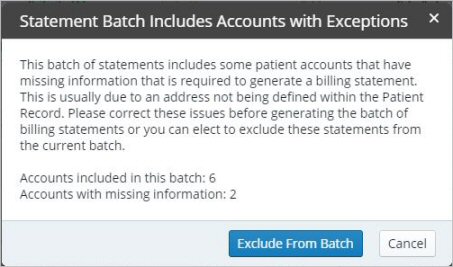
Note: If any of the records are missing required information (exceptions), such as a street address, you are prompted to take action.
After a Successful Transmission
When the transmission is complete, a message is displayed verifying the transmission and details:
- The Clearinghouse verifies the number of statements received.
- Patients receive statements within a few days.
- A .PDF copy of each statement is automatically added to the Patient Files for each patient.
For more information, see How to Set Bulk Automated Statement Preferences.

Comments
0 comments
Please sign in to leave a comment.